How to Use InnoExport
InnoExport is designed to simplify your workflow in Figma by allowing you to export and manage assets with ease. Here’s a step-by-step guide on how to use the basic features of the plugin.
Step 1: Open InnoExport
There are multiple ways to open InnoExport plugin in a project. Here are some examples you might take a try.
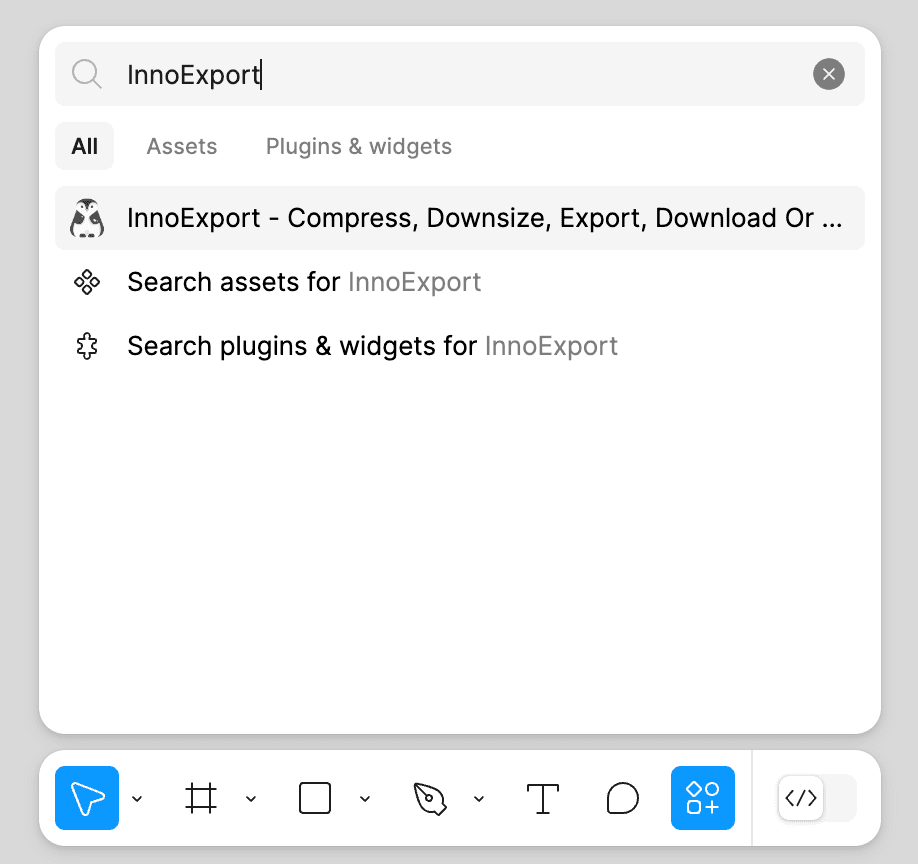
Run InnoExport from Figma Design Mode
- Open Figma.
- Click Actions in the toolbar, or use the keyboard shortcut:
- Search for “InnoExport” in the search bar.
- Click InnoExport in the search results to open it.
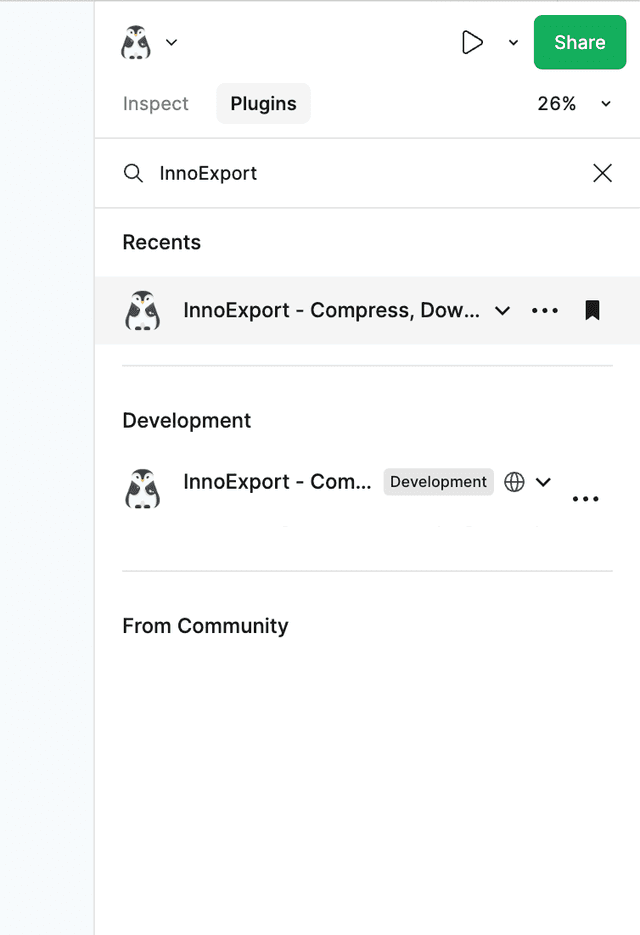
Run InnoExport from Figma Dev Mode
- Open Figma.
- Using one of those methods to open the Plugin tab:
- Click on the “Plugins” tab in the right sidebar.
- Navigate to the top menu bar and click on the “Plugins” menu, then choose “Manage plugins”.
- Right-click on the canvas or a selected layer to open the context menu, then choose “Plugins” and “Manage plugins”.
- Search for “InnoExport” in the search bar.
- Click InnoExport in the search results to open it.
If you get trouble in running InnoExport by following these guides or you want to learn more ways to open InnoExport, please refer to Installation or take a look at the offical guide.
Step 2: Select Layers
In the Figma canvas, select the layers you want to export by clicking the layer in the canvas or using the left sidebar, which is more efficient when you want to select a layer deeply nested in a Group.
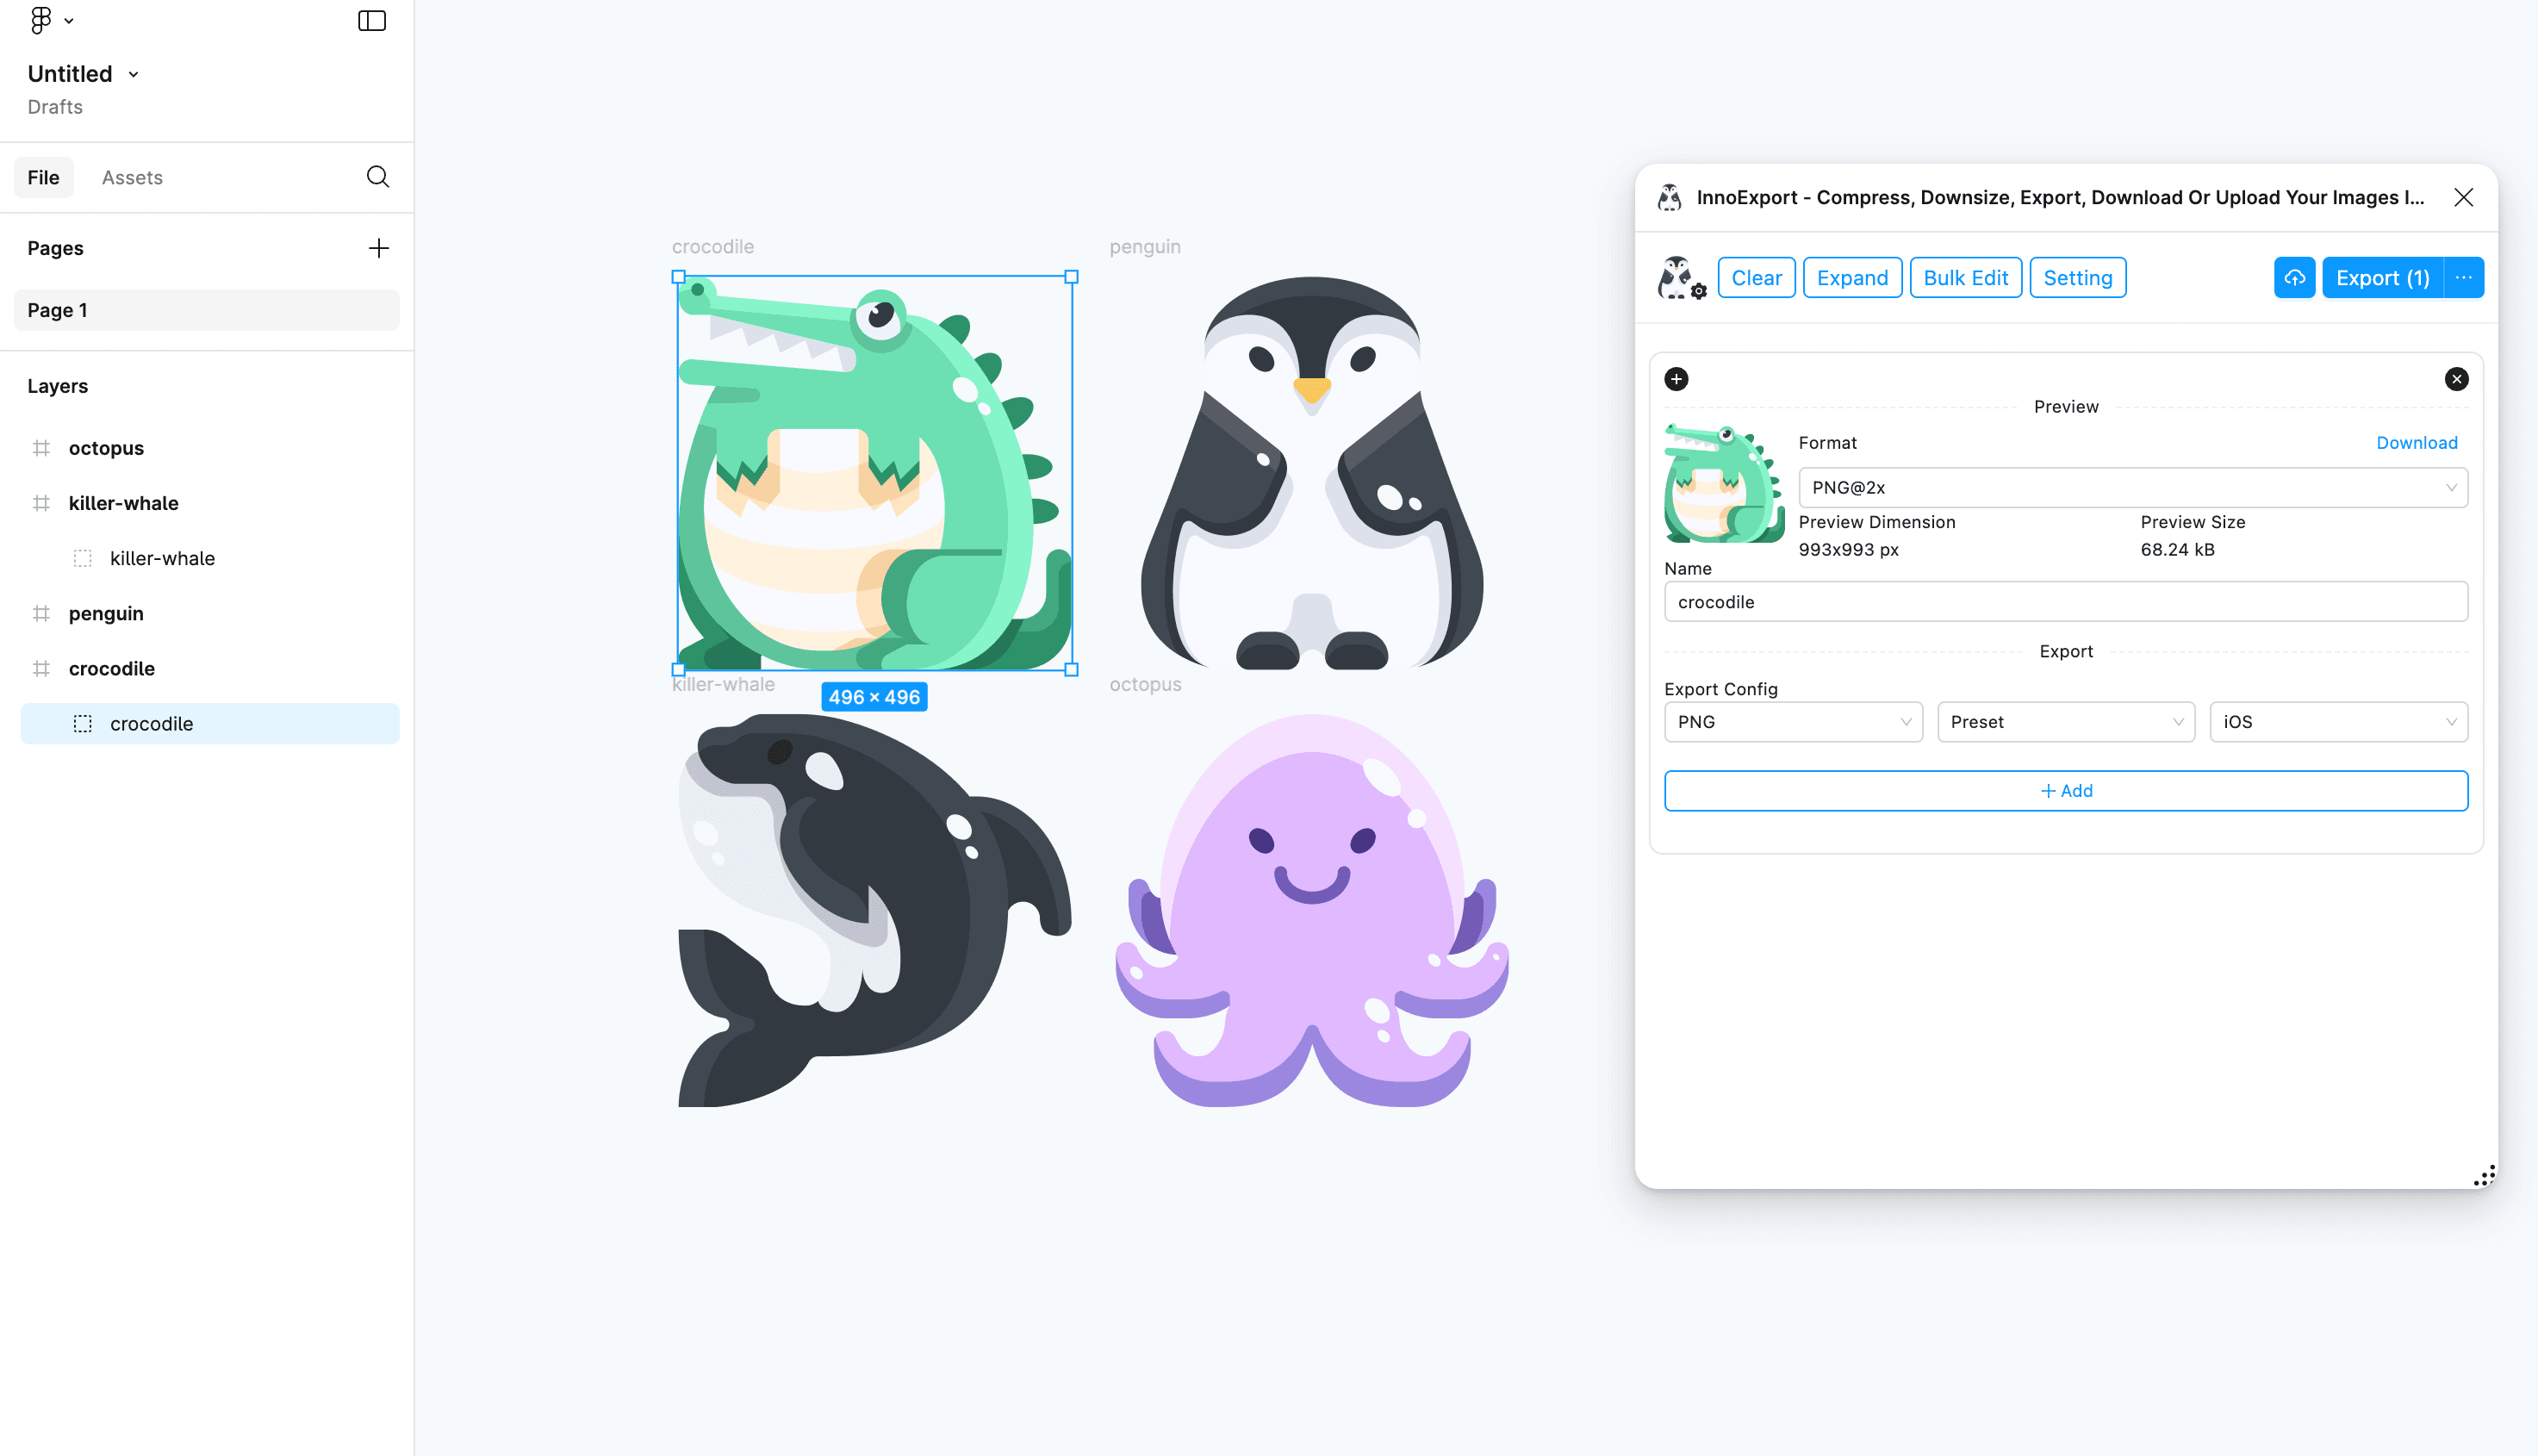
Cannot find the left sidebar or Layer panel?
You can use keyboard shortcuts to open the left sidebar and navigate to Layer panel.
- To toggle the left sidebar:
- Mac:
⌘ Command⇧ Shift\ - Windows:
Ctrl⇧ Shift\
- Mac:
- To switch to Layer panel in left sidebar:
- Mac:
⌥ Option1 - Windows:
Alt1
- Mac:
For more information, please refer to the Figma offical document.
Step 3: Customize Export Settings
Within the plugin interface, you’ll find a range of options to customize your export settings. These options may include selecting the export format, compression settings, and naming conventions for your exported assets.
By default, InnoExport will use the layer’s names as the exported assets name, and generates PNG files without compressed which using the iOS preset(which means you will get 3 image files for each layer you select: myImage.png [email protected] and [email protected]).
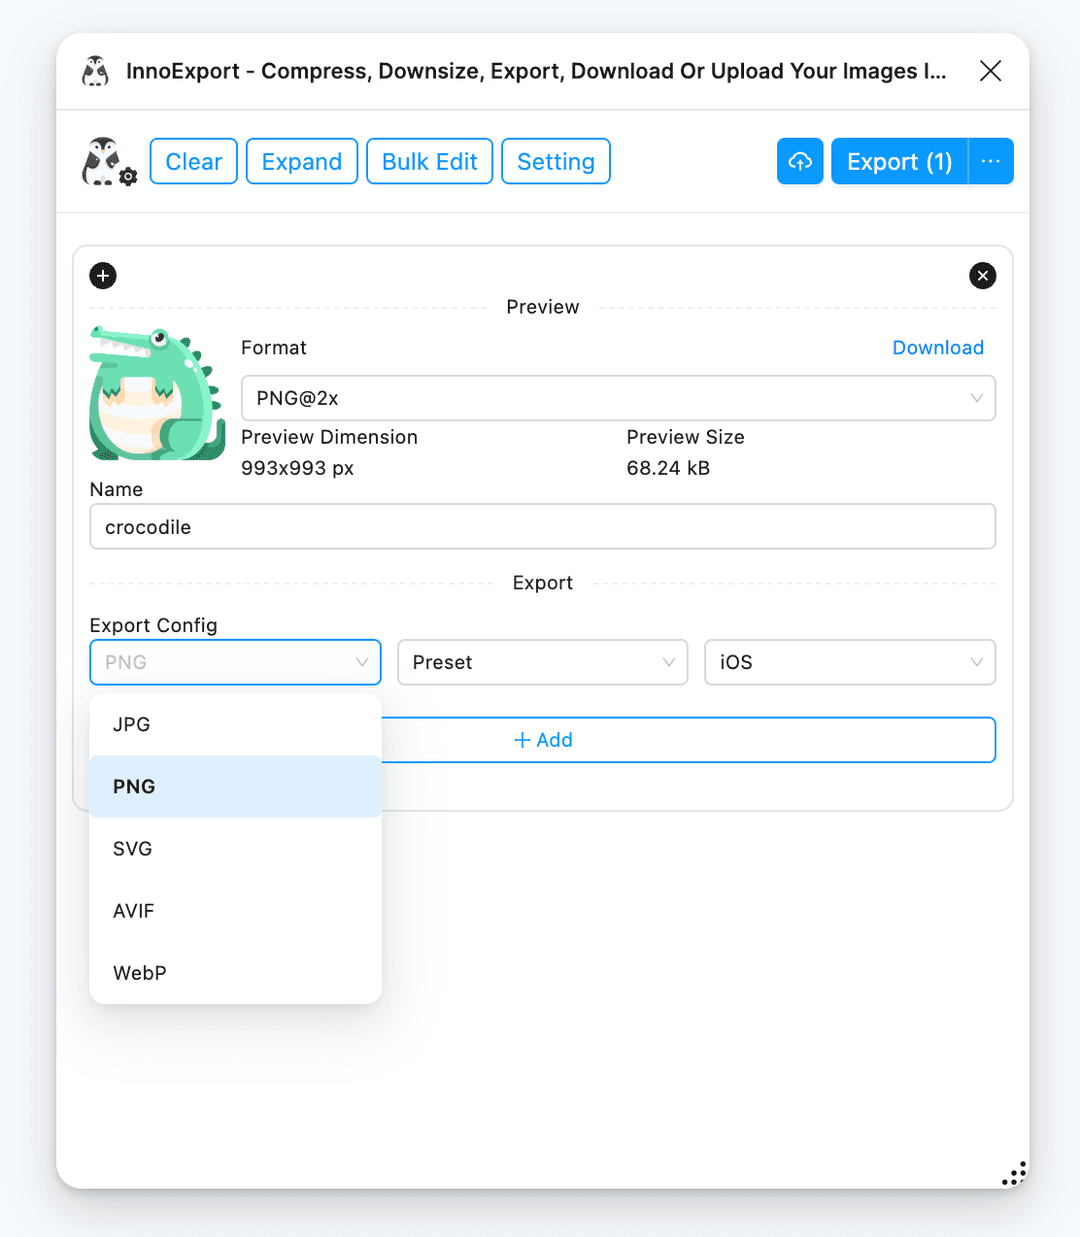
If the default settings doesn’t fullfill your requirements, you can simply modify every options to meet your choice. Please take a look at follwing topics on how to customize your export settings:
Step 4: Export
After configuring the settings, click the Export button to generate and save your assets based on the specified settings.
Be caution to export a layer too large.
If you want to export a layer which has a huge demensions (say
10000x10000 px), after you click the Export button, you may find Figma
loses response to any interactions for up to servral minutes. This is because
Figma trying to export and send the raw image data to InnoExport in the main
thread. InnoExport have no control of this behavior. Please be patient and
wait for the entire process to be done.
Step 5: Batch Editing (Optional)
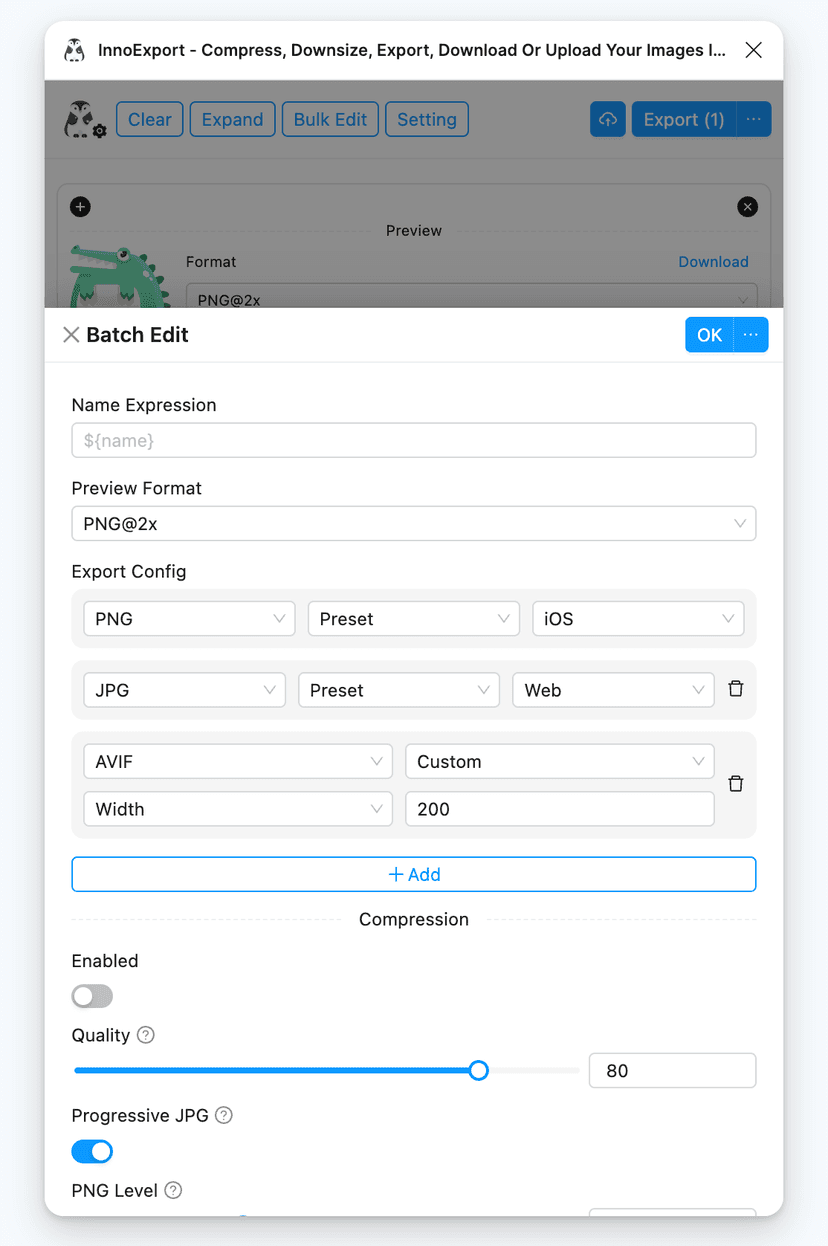
InnoExport offers a batch editing feature that allows you to edit parameters for multiple images simultaneously. If this is your chioce, select the layers and click the Bulk Edit button to show you a batch edit panel, then you will be able to edit export options for all layers you select.
Step 6: Opt-In Endpoint (Optional)
If you want to use the optional endpoint functionality, you can configure it in the settings of the plugin. This feature allows you to send exported image data to a specific endpoint using a HTTP POST method. For more information on how to set up this feature, please refer to the Cloud Service Integration Feature Documentation guide.
Conclusion
By following these steps, you can quickly and efficiently export and manage your assets in Figma using InnoExport. This basic usage guide should help you get started, and the included screenshots offer visual assistance for each step.
For more advanced features and customization options, please refer to the complete documentation or reach out to our support team for further guidance.